GTA San Andreas: Special Vehicles Guide

This post will explain how to obtain the All-Proof, unique White Buffalo car owned by Eddie Pulaski from the mission 'High Noon'.

Before you attempt this, make sure you have saved the game BEFOREHAND! As timing as key on this one in order to make this possible, you have to be quick on the move.

gallery87.jpg
How to obtain this car:

What is needed:
  • Storage space in the Verdant Meadows Garage or Hangar.
  • Body Armor
  • Jetpack!
  • Assault Rifle like the M4
  • Enough Lung Capacity (Maxed out is recommended)
  • Sawn-off Shotgun.
The steps:
  1. Grab the Jetpack and release it just at the entrance of the graveyard of Las Brujas! This must be done BEFORE attempting the mission!
  2. Enter the mission marker and skip through the following cutscenes, until you see Pulaski run away. If you have placed the Jetpack at the entrance of the graveyard, CJ should automatically have the Jetpack on once you regain control.
  3. Boost forward with the Jetpack towards Pulaski's Buffalo, moving past him! YOU MUST ENTER THE BUFFALO BEFORE PULASKI DOES, otherwise you won't be able to succeed in obtaining the All-Proof version of the Buffalo!
  4. Once inside the Buffalo, drive away before Pulaski can pull you out and move towards the small dock to the west of Las Brujas.
  5. Drive the Buffalo into the water and submerge it completely, but keep it close to the shore!
  6. Use the assault rifle to shoot at Pulaski to lure him towards you, but do NOT engage Pulaski in combat! Instead, move into the water and swim away, but keep close to the Buffalo!
  7. If done right, Pulaski will fall into the water eventually, which makes him drown and instantly passing the mission. This will NOT trigger the cutscene of CJ stomping Pulaski to death!
  8. Once the mission is passed, swim back towards the Buffalo and push it back on land, first by pushing it closer to the shore while swimming, then just blasting at it using the Sawn-off Shotgun. If the Buffalo does NOT take damage from this, you SUCCEEDED in making it All-Proof!
  9. Once the Buffalo is back on land, get in the car and drive towards the Verdant Meadows Aircraft Graveyard. No matter if the tires have been popped, you can still drive the car, just take it easy with accellerating.
  10. Put the Buffalo in either the Garage or the Hangar, leave the car and let the Garage/Hangar door close. This will fix the tires.
  11. Open the Garage door back up to confirm it, then save the game.
  12. You now have Pulaski's All-Proof Buffalo at your disposal to do as you please with it.
 
This post will explain how to obtain an unique Maroon Red Manana car from the mission 'Ran Fa Li'. This is one of the easier cars to obtain.

gallery901.jpg
How to obtain this car:

What is needed:
  • Storage space in any garage you please in San Fierro, Doherty would be the closest though..
  • Body Armor
  • Sniper Rifle (optional)
  • Assault Rifle like the AK-47 or M4 or any other weapon you wish.
The steps:
  1. Play the mission 'Ran Fa Li' until you've gotten into the red Manana.
  2. Make your way to the Doherty Garage, disposing of any opposition from the Da Nang Boys if you wish.
  3. Place the car into the garage, and then destroy it (which fails the mission).
  4. Let the garage door close up and open it again. The restored Maroon-Red Manana is now there for you to use.
  5. Save the game.
 
This post will explain how to obtain an unique White-colored Walton which is also Bullet/Melee-proof from the mission 'Madd Dogg'.
gallery432.jpg
How to obtain this car:

What is needed:
  • Storage space in any garage you please, Redsands West in Las Venturas is the closest.
The steps:
  1. Play the mission 'Madd Dogg' as normal, making sure you have taken Madd Dogg to the hospital carefully, thus completing your mission.
  2. Just take the Walton to any safehouse with garage of your choosing and store it.
  3. Save the game.
 
This post will explain how to obtain an unique Pink-colored Windsor from the mission 'A Home in the Hills'.
gallery871.jpg
How to obtain this car:

What is needed:
  • Storage space in any available garage
  • Body Armor
  • Submachine gun like the MP5 and an Assault Rifle or Minigun with sufficient ammunition
The steps:
  1. Play the mission 'A Home In The Hills' as normal, going through Madd Dogg's crib and take out any opposition, stepping into the Windsor to chase down and kill the Vagos drug dealer Big Poppa.
  2. Once the mission is completed, you can drive the Windsor to any garage to store it.
  3. Save the game.
Note: In the event that the Windsor gets destroyed, right as you complete the mission (which can happen if the Phoenix car that Big Poppa drives in blows up too close to the Windsor, making it burn and explode in kind), you can still salvage the car by pushing the wreck to any nearby garage. The game's mechanics allows to fully restore any car wreck you push within a garage after all, which is how certain vehicles with All-Proof or lesser properties can be retained.
 
This post will explain how to obtain an unique Black-colored Vincent from the mission 'Home Coming'.

gallery872.jpg
How to obtain this car:

What is needed:
  • Storage space in the Johnson House Garage as that's the closest
The steps:
  1. Play the mission 'Home Coming' as normal, until you drive Sweet into Grove Street.
  2. When you're tasked to attack Ballas members and Drug Dealers in the hood, move forward a bit so Sweet follows you, but don't engage enemies yet.
  3. Run back to the Vincent, get in before Sweet can and run Sweet over. With sufficient force, this will kill him in one or two hits, failing the mission.
  4. Store the car into the Garage, confirm it to repair damage done to it, just in case.
  5. Save the game.
 
This post will explain how to obtain an All-Proof Infernus car from the mission 'Beat Down On B-Dup'. All-proof means that the car can't be damaged by bullets, collisions, fire, explosives and melee weapons.

gallery899.jpg
How to obtain this car:

What is needed:
  • Storage space in the Johnson House Garage as that's the closest
  • Bike parked within the Johnson House Garage (recommended)
  • Body Armor
  • Any conventional weapon to deal with opposition (Assault Rifle, Sniper Rifle or Minigun with sufficient Ammunition)
  • Sawn-off Shotgun (optional)
  • Monster Truck
The steps:
  1. Play the mission 'Beat Down on B-Dup' as normal, but use a Monster Truck as your main travel vehicle. One is located out in Flint County at a trailer park at the Los Santos Inlet, or if you've successfully finished the 8-Track Stadium event beforehand, one spawns on the parking lot right outside the stadium itself.
  2. Once you've arrived in Glen Park, make sure you park the Monster Truck within the park itself to prevent it from being destroyed during the gang war.
  3. Once you're completed the Gang War and took out B-Dup's Guards, go back in the Monster Truck and park it just close to the main entrance of B-Dup's mian building, which is around the spot seen below. gallery921.jpg
    This is very important for later.
  4. Contintue the mission as normal. You will notice that, if you parked the Monster Truck just at the right spot, when the cutscene of Sweet wanting to take Big Bear to rehab, the Monster Truck wheel will flip the present Infernus over, making it catch fire and eventually blow up, which fails the mission.
  5. Now you can use either the Sawn-off Shotgun, or any other convenient nearby vehicle (or even a Firetruck if you wish) to push the wreck of the Infernus all the way back to the Johnson House.
  6. Push the wreck in the garage. Use the Bike you've parked in the garage beforehand to keep the door open, or quickly push the wreck into the garage. Make sure the wreck does NOT despawn/vanish! Once in the garage, make sure the bike is in there, then close the door of the Garage, as this will restore the Infernus.
  7. Open the garage to confirm this, even test it using Satchel Charges, or any weapon if you wish.
  8. Store the now-restored All-Proof Infernus into the garage and save the game.
 
This post is the first out of four which will explain how to obtain a total of four unique vehicles from the mission 'Cut Throat Business'. These vehicles are:
  • An Unique All-White and All-Proof Newsvan
  • An Unique red and black colored BF Injection
  • An Unique Black and White and All-Proof Vortex
  • An Unique All-White and All-Proof Vortex.
While it is technically possible to obtain them all at the same time, I found it more efficient to obtain them at one at a time, since for obtaining all these vehicles with their special properties intact, a mission failure is required!

This post starts with the Unique All-White/All-Proof Newsvan seen below:
gallery873.jpg
How to obtain this van:

What is needed:
  • Storage space in the Santa Maria Beach Safehouse Garage as that's the closest. Having a bike parked in there beforehand is recommended.
  • Satchel Charges
  • Parachute
  • Firefighter Level 12 completed (for the benefits of being fireproof)
  • Sawn-off Shotgun with plenty of ammunition, Hitman skill is strongly recommended.
The steps:
  1. Play the mission 'Cut Throat Business', but do NOT enter the BF Injection which is parked at Madd Dogg's mansion yet. Instead, move away from the vehicle and place ONE Satchel Charge on Madd Dogg.
  2. Hop into the BF Injection and drive to the spot behind RS Haul where OG Loc has his interview, but leave Madd Dogg behind!
  3. Once at the location, you will see four vehicles parked there, being the Newsvan and Three Vortexes there, two all-white and one in black and white.
  4. Equip the Parachute, hop onto the Newsvan (as it is locked at all times) and just punch/kick onto it until flames come out of the hood, then move to a safe spot and watch the Newsvan being destroyed.
  5. Detonate the Satchel Charge. You won't hear the explosion, but you'll get a message saying that you failed the mission as Madd Dogg died.
  6. Take out the Sawn-off Shotgun and just keep firing at the wreck to push it towards Santa Maria Beach. Watch for oncoming traffic, Police and, if you haven't retaken the territory there yet, any Ballas that might show up.
  7. Once at the garage, place the wreck in a spot in about the middle to where you can easily shoot the wreck into it. Best way is to have the hood of the wreck face you.
  8. Use the bike parked there beforehand to keep the garage door open and shoot the wreck into the garage. If done right, it should easily slide into the garage, but make sure it has a clear path as it will despawn/vanish otherwise!
  9. Park the bike into the garage and let the door close up to restore the Newsvan.
  10. Open the Garage door and check on the newsvan. If done right, the All-White and All-Proof Newsvan should be there for you to use at any time.
  11. Save the game.
 
This post is the second out of four which will explain how to obtain a total of four unique vehicles from the mission 'Cut Throat Business'. These vehicles are:
  • An Unique All-White and All-Proof Newsvan
  • An Unique red and black colored BF Injection
  • An Unique Black and White and All-Proof Vortex
  • An Unique All-White and All-Proof Vortex.
While it is technically possible to obtain them all at the same time, I found it more efficient to obtain them at one at a time, since for obtaining all these vehicles with their special properties intact, a mission failure is required!

This post will explain how to aquire the unique Red and Black BF Injection.
gallery914.jpg
How to obtain this car:

What is needed:
  • Storage space in the Santa Maria Beach Safehouse Garage as that's the closest.
  • Satchel Charges
The steps:
  1. Play the mission 'Cut Throat Business', but do NOT enter the BF Injection which is parked at Madd Dogg's mansion yet. Instead, move away from the vehicle and place ONE Satchel Charge on Madd Dogg.
  2. Hop into the BF Injection and drive to the Santa Maria Beach garage, make sure to leave Madd Dogg behind!
  3. Once the BF Injection has been stored in the garage, you can either choose to detonate the Satchel Charge to fail the mission, or hop into a different car to continue the mission instead and try to obtain one of the other vehicles located behind RS Haul if you so desire.
  4. Whether you choose to fail or continue the mission, make sure you confirm the BF Injection first before saving, it will disappear otherwise.
 
Last edited:
This post is the third out of four which will explain how to obtain a total of four unique vehicles from the mission 'Cut Throat Business'. These vehicles are:
  • An Unique All-White and All-Proof Newsvan
  • An Unique red and black colored BF Injection
  • An Unique Black and White and All-Proof Vortex
  • An Unique All-White and All-Proof Vortex.
While it is technically possible to obtain them all at the same time, I found it more efficient to obtain them at one at a time, since for obtaining all these vehicles with their special properties intact, a mission failure is required!

This post will explain how to aquire the unique Black and White and All-Proof Vortex which in the mission proper is driven by OG Loc when he goes on the run.
gallery916.jpg
How to obtain this hovercraft:

What is needed:
  • Storage space in the Santa Maria Beach Safehouse Garage as that's the closest.
  • Satchel Charges
The steps:
  1. Play the mission 'Cut Throat Business', but do NOT enter the BF Injection which is parked at Madd Dogg's mansion yet. Instead, move away from the vehicle and place ONE Satchel Charge on Madd Dogg.
  2. Hop into the BF Injection and drive to the spot behind RS Haul where OG Loc has his interview, but leave Madd Dogg behind!
  3. Once at the location, you will see four vehicles parked there, being the Newsvan and Three Vortexes there, two all-white and one in black and white.
  4. Detonate the Satchel Charge. You won't hear the explosion, but you'll get a message saying that you failed the mission as Madd Dogg died.
  5. Hop into the Black-and-White Vortex and drive it back towards the Santa Maria Beach Safehouse.
  6. Park the Vortex into the safehouse's Garage, confirm it's there to be sure once the garage door closes, and then save the game.
  7. If done right, you now have a unique black and white, ALL-PROOF Vortex for you to drive on the road and on the water at any time you please.
 
This post is the fourth and last out of four which will explain how to obtain a total of four unique vehicles from the mission 'Cut Throat Business'. These vehicles are:
  • An Unique All-White and All-Proof Newsvan
  • An Unique red and black colored BF Injection
  • An Unique Black and White and All-Proof Vortex
  • An Unique All-White and All-Proof Vortex.
While it is technically possible to obtain them all at the same time, I found it more efficient to obtain them at one at a time, since for obtaining all these vehicles with their special properties intact, a mission failure is required!

This post will explain how to aquire the unique All-White and All-Proof Vortex which in the mission proper is driven by either the player or Madd Dogg when the chasing of OG Loc begins.
gallery915.jpg
How to obtain this hovercraft:

What is needed:
  • Storage space in the Santa Maria Beach Safehouse Garage as that's the closest.
  • Satchel Charges
The steps:
  1. Play the mission 'Cut Throat Business', but do NOT enter the BF Injection which is parked at Madd Dogg's mansion yet. Instead, move away from the vehicle and place ONE Satchel Charge on Madd Dogg.
  2. Hop into the BF Injection and drive to the spot behind RS Haul where OG Loc has his interview, but leave Madd Dogg behind!
  3. Once at the location, you will see four vehicles parked there, being the Newsvan and Three Vortexes there, two all-white and one in black and white.
  4. Detonate the Satchel Charge. You won't hear the explosion, but you'll get a message saying that you failed the mission as Madd Dogg died.
  5. Hop into the All-white Vortex and drive it back towards the Santa Maria Beach Safehouse.
  6. Park the Vortex into the safehouse's Garage, confirm it's there to be sure once the garage door closes, and then save the game.
  7. If done right, you now have a unique all-white, ALL-PROOF Vortex for you to drive on the road and on the water at any time you please.
Should you have gone through the effort to obtain all four of these special vehicles, then your garage at the Santa Maria Safe House should be looking like this:
gallery426.jpg
 
As you may have noticed, I recently have begun playing GTA San Andreas again and have increased my Special Vehicle Collection, with a total of 65 vehicles in my current finished playthrough.

So, in commemmoration of that, here's another trick that I've discovered that helps in storing as many special vehicles as possible early in the game. And this trick is the ability to use the Doherty Garage Early trick.

The Doherty Garage, which is normally unreachable until the events of 'The Green Sabre', is actually available to use and store vehicles in from the very start of the game, however, if one were to enter the area of Flint County before the events of 'The Green Sabre', you'd get normally slapped with a 4-Star Wanted level. However, there are a few moments where one can safely cross and explore the area without getting a wanted level and without the use of cheats!

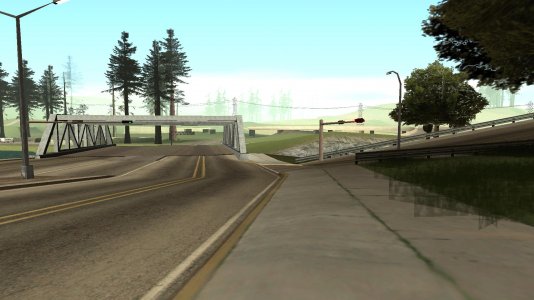
For example, in the mission Just Business, during the shoot-out scene against the Russians outside the Atrium, wanted levels as well as regular traffic are disabled, which means you can take down only a few Russians and then bail out of the area and head to the nearby gas station where a parked Broadway is present there. In fact, the ONLY vehicles that will spawn in the area are the ones parked in parking lots and other 'scripted' areas as well as your garages. From there, you can use the Broadway to drive to a garage, pick up any fast bike you've stored (PCJ-600, BF-400, FCR-900 and NRG-500 for example), and drive towards the Santa Maria Beach area (but avoid the area where Big Smoke has his shootout with the Russians!), towards the bridge leading into Flint County.
gallery952.jpg
Drive with high speed on the bike over the area between the crash barrier with traffic light and the bridge post, and this will land you safely into Flint County, with NO wanted level to speak of! Now you can drive all the way to the Doherty Garage, store the bike there and then return to Los Santos to either continue the mission or pick-up the next bike if you so choose.
 
This post will explain how to obtain an All-Proof Glendale car from the mission 'Los Desperados'. All-proof means that the car can't be damaged by bullets, collisions, fire, explosives and melee weapons.

gallery918.jpg
How to obtain this car:

What is needed:
  • Storage space in the Verdant Bluffs/El Corona Safehouse
  • Body Armor
  • Assault Rifle like the AK-47/M4 Carbine or Submachine gun like MP5
  • Minigun or Sawn-off Shotgun with sufficient ammo
  • Tow Truck (optional).
The steps:
  1. Play the mission 'Los Desperados' until you come to the shootout in the alley, where Sunny brings out a Rocket Launcher to help in the fight against the Vagos.
  2. Move past the battlefield to obtain a Blade (should be parked in the street close to the El Corona Safehouse) or fetch a Tow Truck (preferrably parked in the garage of your safehouse) and drive around the battlefield back to the area behind it, and use the car to run Sunny over (which fails the mission).
  3. Now either use the Tow Truck to hook onto the car and drag it to the El Corona Safehouse, or use the Sawn-off Shotgun or Minigun to 'push' it to the El Corona safehouse instead.
  4. Push the Glendale into the Garage, release it (in case you've used the Tow Truck) and confirm the Glendale next.
  5. Save the game.
  6. You now have an All-Proof Glendale at your disposal to use at anytime.
 
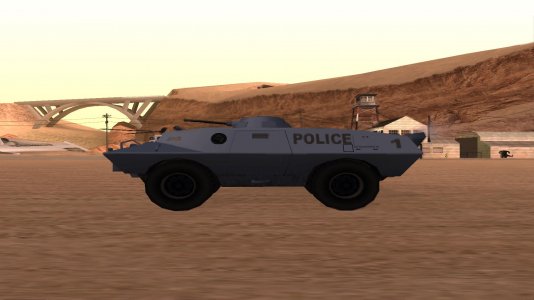
This post will explain how to obtain the extremely rare S.W.A.T. Tank from the mission 'End of the Line'. This SWAT Tank is also Bullet- and Fireproof.
gallery330.jpg
How to obtain this car:

What is needed:
  • Storage space in any big garage (Johnson House, Doherty Garage, Verdant Meadows)
  • Body Armor
The steps:
  1. Play the mission 'End of the Line' until you're tasked to steal the SWAT Tank.
  2. Steal the SWAT Tank as prompted, but instead of driving to Big Smoke's Crack Palace, drive the vehicle to Glen Park and carefully drive it into the water, until you get a message that the mission has failed due to the APC being 'destroyed'.
  3. Get out of the APC and push it out of the water, at least enough to where you can enter the APC and reverse it out of the water.
  4. Drive the SWAT Tank to any garage big enough to store it in.
  5. Confirm the SWAT Tank in the garage, then save the game.
 
This post will explain how to obtain the All-Proof Feltzer from the mission 'End of the Line'. All-Proof meaning that the vehicle is Bullet/Damage/Explosion/Fire and Melee-proof. gallery900.jpg
How to obtain this car:

What is needed:
  • Storage space in the Johnson House garage.
  • Body Armor
  • Any Assault Rifle, Sawn-off Shotgun and/or Minigun to deal with any opposition within Big Smoke's Crack Palace
The steps:
  1. Play the mission 'End of the Line' until you have to chase Tenpenny in the Feltzer that you'll automatically get into.
  2. Chase Tenpenny down until you arrive at Glen Park.
  3. Where Tenpenny turns left, you go straight ahead to the Pond of Glen Park and dump the car into the water. This will Fail the mission.
  4. Push the Feltzer out of the water (by either pushing against it, use the Sawn-off Shotgun or the Minigun, as long as you don't flip the car over).
  5. Once the Feltzer is out of the water, step in the car and drive to the Johnson House garage.
  6. Park the Feltzer into the garage, confirm it and then save the game.
Note that, should you fail this attempt, you can immediately try it again as any subsequent attempt at the mission 'End of the Line' will start directly with chasing Tenpenny down if you've succeeded in killing Big Smoke but failed to keep chasing Tenpenny to save Sweet.
 
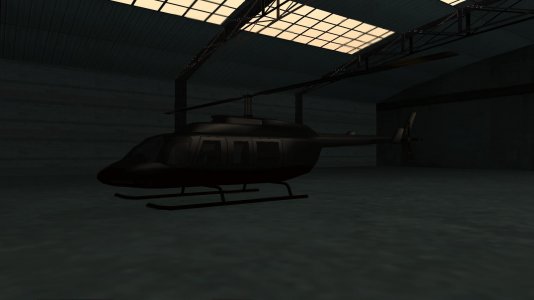
This post will explain how to obtain an Unique Black Maverick Helicopter from the mission 'Interdiction'.
gallery92.jpg
How to obtain this helicopter:

What is needed:
  • Access to Verdant Meadows.
  • Body Armor
  • Minigun
  • Tow Truck
The steps:
  1. Play the mission 'Interdiction' as normal: arrive at Toreno's Ranch using the Tow Truck and proceed to the first destination at Las Brujas.
  2. Do NOT pick up the Rocket Launcher or use any of the vehicles presented to you (Quad, Sanchez or Bandito)! Use the Tow Truck to drive up the mountain!
  3. Stop BEFORE entering the marker and exit the Tow Truck.
  4. Enter the marker to set up the flare for the Leviathan chopper to come in. This is where the Black Mavericks come to try and shoot the Leviathan down.
  5. Use the Minigun to fire at the Black Mavericks in short bursts! If done right, the helicopters should fall down WITHOUT exploding! This is very important! Best way to make this happen is with the Black Maverick that hovers to bring down the agents with AK-47s.
  6. Once the Leviathan has moved to drop the contraband, enter the Tow Truck!
  7. If you see one of the Black Mavericks still intact on the ground and stationary, reverse CAREFULLY in front of the Maverick so the nose of the helicopter will attach to the crane of the tow truck when lowered.
  8. Raise the crane once the Maverick is attached to it and carefully drive down the mountain path and CONTINUE THE MISSION! Make sure you keep the Tow Truck WITH the Maverick attached to it with you at all times, do NOT stray too far away from it!
  9. When the mission is completed by delivering the contraband to Las Brujas as instructed, drive the Tow Truck with the Maverick attached to it carefully back to Toreno's Ranch to start the mission 'Verdant Meadows'. Be careful of the traffic; the Maverick is very vulnerable at this time and the slighest hard collission wil make it explode!
  10. Start the mission 'Verdant Meadows' and drive the Tow Truck with the Maverick STILL attached to it towards the Verdant Meadows Aircraft Graveyard.
  11. Purchase the property. Now you can drive the Tow Truck with the Black Maverick into the large hangar big enough to store the helicopter in.
  12. Release the Maverick from the Tow Truck's crane and and exit the hangar. KEEP THE MAVERICK IN SIGHT AT ALL TIMES EVEN AS THE HANGAR CLOSES! This will 'confirm' the Maverick and does NOT make it despawn.
  13. Once the Hangar doors are closed, approach it again to open it up. If done right, a fully restored Black Maverick is there for you to use.
 
This post will explain how you can give some vehicles unique modifications and unique colors, even though these vehicles can normally NOT be modified in ANY shop from TransFender! This is more practically known as a Exclusive Color/Exclusive Color Conversion, and this is all done without the use of any cheats. For my example here, I've modified a Hotring Racer car and a NRG-500 bike, but you can choose to do this up to FOUR vehicles maximum.
gallery113.jpg
Modded Hotring Racer (Yellow and Green body color, Off-Road wheels, Nitro)
gallery114.jpg
Modded NRG-500 (Twist Wheels, Red and Green body color)

How to obtain this:

What is needed:
  • Any of the vehicles you wish to modify stored in the Johnson House Garage. Make sure these are NOT reversed into the garage, or else these vehicles will disappear as you've accidentally 'left' the garage with them.
  • Body Armor
  • Any conventional weapon to deal with most opposition encountered, Minigun, Sawn-off Shotgun and/or AK-47/M4 Carbine recommended
The steps:
  1. Play the mission 'Home Coming' like normal, make sure that you take out the Ballas first BEFORE taking on the Dealers.
  2. When attacking the Crack Dealers, drive a vehicle up to one of the Dealers and bump against him to make him fall over, but do NOT kill him! Instead, when the dealer is knocked over, drive the vehicle gently over it to keep the dealer 'pinned down', so he won't get up.
  3. Take out the rest of the dealers, then move into a different vehicle with Sweet and drive to TransFender at Temple and enter it. This will automatically finish the mission, but you will find yourself in 'Black Hell' given the surroundings.
  4. Enter the Johnson House garage (marked by the dollar sign). You'll know you've entered it when the camera switches to an 'isometric' view.
  5. Enter the vehicles you wish to modify (this will make CJ disappear and the mod menu appear).
  6. Use the Accelerate button to select the color option from the menu. This will make the screen turn black, but will keep the mod menu active.
  7. Now select whatever modifications you want to add to the vehicle you're in, exit the vehicle and proceed to the next and repeat the process. Keep in mind that the screen is still black, so you will be doing this blindly, but you'll see the name of the vehicle appear once you've entered it.
    IMPORTANT! Certain modifications will NOT work on ALL vehicles! Selecting Nitro or Hydraulics on a bike like the NRG-500 for example causes the game to crash! Selecting these options on for example the Hotring Racer however does NOT crash the game!
  8. Once you're done with the modifications, exit TransFender fully. You'll be appearing with your latest modded vehicle from the TransFender garage.
  9. Enter the modded car and drive it to any safehouse of your choosing (provided you have room for them) or just the Johnson House to store them.
  10. Once the vehicles are stored and confirmed, save the game.
 
This post will explain how to obtain an All-Proof Bravura from the mission 'The Green Sabre'. As stated before, All-Proof meaning that the vehicle is Bullet/Damage/Explosion/Fire and Melee-proof, thus it can NOT be destroyed by the 'traditional/conventional' methods. Only flipping it upside down, dumping it in the water or arming it with a Car Bomb can actually destroy the vehicle, and either starting the Lowrider Challenge or going on a date with a girlfriend and having 'coffee' with her in-game will make the vehicle lose its unique property.

gallery228.jpg
How to obtain this:

What is needed:
  • Storage space in the Verdant Bluffs/El Corona Safehouse or the Santa Maria Beach safehouse. Having a bike stored in either garage beforehand is recommended.
  • Body Armor
  • Parachute!
  • Sawn-off Shotgun or Minigun with plenty of ammunition. Having the Hitman skill on Sawn-off Shotgun is recommended.
  • Timing is key!
The steps:
  1. Play the mission 'The Green Sabre' as normal, until you arrive at the spot where the Bravura is parked at Verdant Bluffs.
  2. Do NOT enter the car! Instead, hop onto the car, equip the Parachute and punch/kick the car until you see black smoke emitting from the hood. The right passenger door should also fall off.
  3. Hop off the car, stand beside it and keep punching/kicking it until flames emit from the hood. It will take approx. 5 seconds for ANY car which has flames coming out of the hood to explode. Enter and IMMEDIATELY exit the car between approx. the 3rd and 4th second. The screen will fade out and the car should explode right before the cutscene begins, which should take off only part of your body armor's health away!
  4. Stand behind the wreck while keeping it on screen. Wait until Sweet's healthbar is depleted at which you'll see the 'Mission Failed' message pop on screen.
  5. Now, use your Sawn-off Shotgun or the Minigun to push the Bravura wreck to the garage of your choice.
    1. The Verdant Bluffs/El Corona Safehouse is the closest in terms of distance, but moving it to Santa Maria Beach will avoid any gang encounters as you will have to pass through the territories of the Varrios Los Aztecas to get there (and those gang members, while being not as aggressive compared to the Ballas, WILL attack you in response to any gunfire).
    2. The wreck is also marked by the game as 'heavy', thus pushing it on foot or with any vehicle (from regular cars to the Dozer or the Rhino) will NOT work. Thus you HAVE to use either the Minigun or Sawn-off Shotgun to make it move!
  6. Once at the garage, make sure the wreck is positioned in a way where you can easily push it in the garage with the Sawn-off Shotgun. Make sure there is NOTHING blocking it or the wreck WILL despawn! If you have a bike stored there, use it to keep the garage door open to make it easier.
  7. Once you've shot the wreck into the garage (and made sure it's STILL present!), push the bike into the garage and leave to where the door will close, keep the wreck on-screen during this!
  8. Move back to the garage and open it. The Bravura is now fully restored with its All-Proof property intact.
  9. Save the game.
 
This post will explain how to obtain an All-Proof Sabre from the mission 'The Green Sabre'.

gallery227.jpg
How to obtain this car:

What is needed:
  • Storage space in any safehouse garage available, for distance purposes it would be wise to go for either the Johnson House or Verdant Bluffs.
  • Body Armor
  • A Minigun with AT LEAST 100 shots! This is the most tricky one as this gun is rare, and the only spot in which this weapon can be safely obtained is from an underground parking garage in Las Venturas, which is normally inaccessible at the time (you can enter Las Venturas, but at the risk of a 4-star wanted level)
The steps:
  1. Play the mission 'The Green Sabre' as normal until you have to go to the Mulholland Intersection to save Sweet.
  2. Drive to the battle zone, but do NOT enter the red marker and do NOT kill ANY of the Ballas!
  3. Use the Minigun and fire AT LEAST 100 shots at the nearest Sabre. While it initially damages the car, after about 100 shots, it gets converted to an All-Proof state! Avoid shooting at the gas tank however as that will instantly destroy the vehicle!
  4. Get into the car and drive away to your safehouse. As it is out of the range of the red marker, driving away from the scene is easier.
  5. Doing this right will eventually give a mission prompt that Sweet has died, which fails the mission. Let this happen and store the vehicle in the garage.
  6. Save the game.
  7. Return to the garage, retrieve the Sabre and fire at it with whatever is left of any Minigun ammo you have or even the Sawn-off Shotgun, or use Molotovs or whatever other weapon you now want to use on it. If you see that the vehicle does NOT take damage from that (not counting popped tires), you've got yourself an All-Proof Sabre to use at your leisure.
It is technically possible to obtain an All-Proof Sabre and the All-Proof Sentinel at the same time, just make sure you have at least 200 bullets in your minigun as you will have to shoot at the vehicles first in order to make them All-Proof, and also make sure you avoid driving into the red marker when getting into the Sentinel.

Given the situation, unless you really want this one for your collection, it's better to wait with getting an All-Proof Sabre until you meet up with Catalina in Dillimore, as there is another All-Proof Sabre present that can be obtained, and is technically easier to do as you should have some more available space in garages then.
 
This post will explain how to obtain a Bullet-Proof Tanker truck with an All-Proof Tanker Trailer from the mission 'Tanker Commander'.
gallery263.jpg
How to obtain this truck:

What is needed:
  • Storage space in the Doherty Garage
  • Sniper Rifle
  • Sawn-off Shotgun with plenty of ammo
  • Body Armor, in case of police attention.
The steps:
  1. Start the mission 'Tanker Commander', which is the easiest to do after the 'First Date' cutscene mission.
  2. Once you're task to enter the cabin of the truck, don't enter the cabin yet!. Instead, use the Sniper Rifle to kill Catalina in the passenger seat, which fails the mission.
  3. Hop into the Tanker Truck and move to hook the trailer next to it onto the cabin.
  4. Once the trailer is attached to the truck, drive towards the Doherty Garage in San Fierro
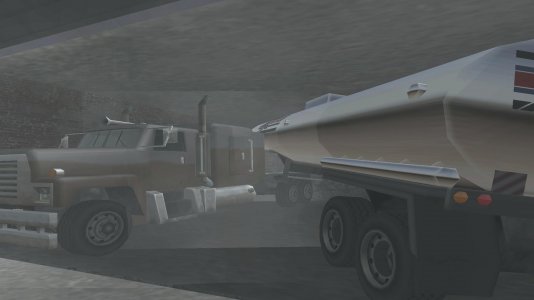
  5. Once there, park the Tanker Truck with trailer into the garage. Getting the trailer inside is tricky, and it can't be pushed even when it's unhooked from the trailer; this is where the Sawn-off Shotgun comes in. The Trailer should be parked at an angle into the garage, which is the only way possible for it to be stored to keep it. The truck itself should be parked on the opposite end of the garage itself, as shown in the image above.
  6. Once it's stored and confirmed, save the game.
Personally this isn't an ideal vehicle to obtain. The only reason I've posted this up here is to show you the only possible way it can be done if you do want it, and the Doherty Garage is the only garage available that's just big enough for it to be parked. The fact that you can even use the Doherty Garage even before doing the mission 'Are You Going To San Fierro?' helps here. The Bullet-proof cabin should be enough to have, as the trailer still has the risk of being ejected out of the garage. If you want to have any special vehicles from the 'Tanker Commander' mission, just settle for the All-Proof Sabre and All-Proof Sadler instead, those two are much easier to obtain and store as you'd have more options of safehouses with garages to choose from when storing it, with the Sadler being the far easiest one to obtain and keep.
 
Remember the Exclusive Color/Exclusive Modification Conversion trick I described earlier using the mission 'Home Coming'? It's possible to do this in the mission 'The Green Sabre' as well!
gallery256.jpg
For this example I only did this on the NRG-500 bike here, but you can use any car or bike you want that normally CAN'T be modded at TransFender's to make it happen, up to FOUR vehicles max!

How to obtain this:

What is needed:
  • Any of the vehicles you wish to modify stored in the Santa Maria Beach Garage, which I used here as an example. Make sure these are NOT reversed into the garage, or else these vehicles will disappear as you've accidentally 'left' the garage with them.
  • Body Armor
  • Satchel Charges
  • Any conventional weapon to deal with most opposition encountered
The steps:
  1. Play the mission 'The Green Sabre' like normal, the only exceptions here is to keep one Ballas member alive after meeting up with Sweet and shoot down the three Grove Street Family members.
  2. Use any of the stationary cars like a Sabre to knock the last Ballas member over, but do NOT kill him with it! Just make sure he can't get up.
  3. Park any of the other cars nearby, like a Pony van, and park it right behind the car which has the Ballas member pinned down.
  4. Get out of the car and place a Satchel Charge at the back of that second car. Satchel Charges can be found in an alley between the Inside Track Betting Shop and another building in Montgomery.
  5. Get into a different car, like one of the Sentinels parked around Sweet, and drive to the TransFender shop in Market.
  6. Stop right before the red marker. Get out of the car, detonate the Satchel Charge then get quickly back into the car and drive into the red marker. If done right, the mission should continue, but you should see a Mod Menu on screen!
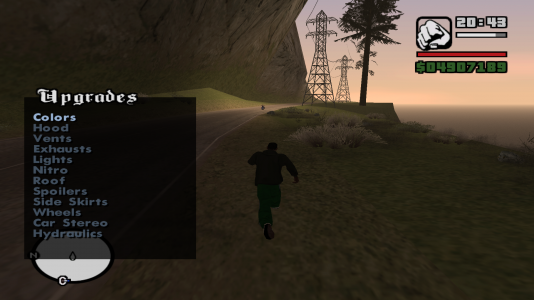
  7. If the screen is black even after skipping the next cutscenes, purchasing and then entering the Angel Pine Safehouse will remedy this. If you still have a normal screen already, head to the Santa Maria Beach Safehouse on foot, or jump ONTO a car that heads to the direction of the Los Santos inlet to make it at least quicker to get there. Either way, you should be seeing something like this on your screen:Mod Menu In Gameplay.png
  8. When in the garage, get into the car you wish to mod with unique colors and other wheels.
    NOTE: Keep in mind that NOT ALL modifications will work! Options such as selecting a spoiler on a Hotring Racer or Nitro on a NRG-500 will crash the game!
  9. Once you've selected the colors and any options you want on your vehicle, exit the mod menu. You should now be in TransFender in your last modded vehicle. Enter that vehicle in case you exited it, and move to any nearby garage to store the modded vehicle in.
  10. Save the game.
 
Back
Top Bottom