GTA San Andreas: Special Vehicles Guide

Z-Fighter

Red Jacket
Joined
Sep 4, 2015
Posts
2,619
Location
The Netherlands
Website
rt912.deviantart.com
Having recently played Grand Theft Auto: San Andreas again, I felt it might be interesting to share a bit of trivia with those here whom have played this game too, so please reply to here in this thread if you want to know more.

Now, next to all the various vehicles that are present within the game, there are also so-called 'Special Vehicles' around. While these vehicles look like any of the ordinary cars you can find anywhere in the game, save for a very few, the Special Vehicles share either one or all of the following:

  1. These vehicles only appear in certain missions.
  2. The vehicles have a unique colour, which can NOT be found anywhere else or through mod shops like TransFender.
  3. The vehicles have a unique modification which also can not be found on any other model or mods.
  4. The vehicles have a resistance to certain types of damage.
This kind of resistances can be either or ALL of the following:
  • Bullet-proof (resistance to any conventional firearms)
  • Damage-proof (Vehicles can't be damaged through collissions)
  • Fire-proof (Weapons like Flamethrowers or Molotov-cocktails can't harm them for one)
  • Explosion-proof (Explosions from other vehicles or weapons like Satchel Charges won't damage this vehicle)
  • Melee-proof (Fists or melee weapons like the Baseball Bat, Golf club etc. can't harm the vehicle)
If a vehicle has ALL of the above resistances, it's an ALL-PROOF aka Full immune variation.

Now, there are ways to still destroy a proofed vehicle, but these are done through unconventional means:
  • Flipping the car upside down
  • Starting the Lowrider Challenge will remove the special properties
  • Punching the vehicle while wearing the parachute
  • Sinking the car in the water (this is considered destruction by the game, but if you're able to push it out, it will retain its properties regardless)
  • Taking it to any of the available girlfriend's house and have coffee with her will remove the special properties
  • Using the car bomb from the Bomb Shops in the game.
  • Using the 'Blow Up All Cars' cheat
  • Getting in the vehicle while the player is on fire.
So, with all that said, I'll be posting up a step-by-step guide to obtain the vehicles I've been able to gain through missions. While it may not be possible to obtain ALL of the special vehicles in the game, you can still get a good amount of them if you so desire; my current finished playthrough has 52 special vehicles stored in the garages. In total, I have tested and succeeded in obtaining a total of 81 of these Special Vehicles.

Before I will post up the first one, here's a little guide to prepare yourself if you wish to attempt to obtain any of these vehicles by yourself. While I will be listing some requirements with each mission-based vehicle, here's a list of things you can do in advance to plan ahead:

  1. Save your game BEFORE attempting a mission which features a special vehicle which you want to obtain. Since in most of the steps I will lay out to obtain a special vehicle requires/causes a mission to fail, it will save you a LOT of frustration in case you've made a lot of progress. That and there's also the risk of getting Busted, Wasted, your attempts fail in general or even a game crash.
  2. Stock up on ammunition of certain weapons. As some of the vehicles may be coded to be too heavy or unconventional to be pushed, you can still make them move about the area by using a weapon, primarily the Sawn-off Shotgun.
  3. Purchase ALL available safehouses prior to do any missions! Since most garages have space to store up to 4 vehicles, having plenty of space available beforehand is mandatoryif you wish to have as many of the special vehicles as you possibly can obtain. The best garages available include:
    1. The Santa Maria Beach Safehouse (Available from the start)
    2. The Verdant Bluffs Safehouse (Available from the Start)
    3. The Doherty Garage (Accessible after 'The Green Sabre')
    4. The Palomino Creek Safehouse (Available after 'The Green Sabre')
    5. The Hashbury Safehouse (Available after 'Are You Going To San Fierro?')
    6. The Paradiso Safehouse (Available after 'Are You Going To San Fierro?')
    7. The Abandoned AC Tower (Purchased in the mission 'Verdant Meadows')
    8. The Prickle Pine Safehouse (Available after 'Learning To Fly').
  4. Once you've obtained one of the available special vehicles, SAVE YOUR GAME! That way you have a save file that includes one of those available vehicles for you to use.
  5. Regarding the vehicles with a unique colour, use ONLY your garages to repair them in case of damage, as going to a Pay & Spray will make them lose that unique colour.
Now, with all that said, leave a comment if you please and I will begin soon with the first vehicle. Keep in mind that all screenshots I will post of the vehicles are the ones I've made myself, unless I specifically specify otherwise!.
 
Last edited:
Here is the first Special Vehicle that you can encounter AND obtain in GTA San Andreas:
gallery2.jpg
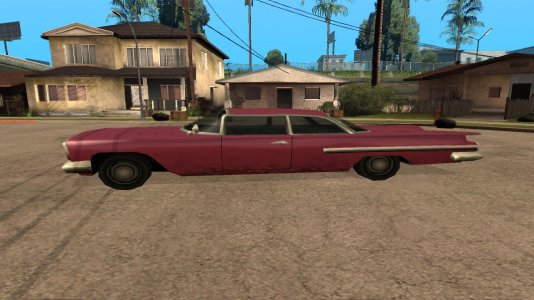
This vehicle, known as the Voodoo, is a luxury two-door lowrider.

This version has a rather unique pink-colored body colour and is used by the Ballas, a gang hostile to the player's gang, being the Grove Street Families. There are two of these pink Voodoos in the game, the first one is encountered in the mission 'Sweet & Kendl'.

How to obtain this unique Pink Voodoo
What is needed:
  • Storage space at the Johnson House
  • An assault rifle like the AK-47, or a Submachine gun (Tec-9, Micro-SMG or MP5 if you wish).
  • Body Armor
The steps to obtain this vehicle:
  1. Play the mission as normal, until you are ordered to get on the BMX. Get on the BMX, but do NOT follow Sweet! Keep your distance until the Ballas car shows up to attack.
  2. Get off the BMX, take out your submachine gun or assault rifle and attack the Ballas car. Make sure you hit the driver so he will fall out of the car, leaving the door open at which the passenger gets out. Shooting the passenger first will make the driver leave the car, but also closes the door, which automatically locks the car, so you won't be able to get in.
  3. Kill the other Ballas member, get into the Pink Voodoo, drive it to the Johnson House and place it in the garage. Exit the garage so the door closes.
  4. Take any other random vehicle and go back to pick up the BMX you need to use to follow Sweet (indicated by a blue dot on the minimap).
  5. Take the BMX and drive to the canal at Marina, and dump the BMX into the water. This will fail the mission, which is mandatory if you wish to keep the vehicle.
  6. Go back to the Johnson House. If you open the garage, you will see the Pink Voodoo there still standing, but likely with locked doors.
  7. Play the mission 'Big Smoke' and 'Sweet & Kendl' again, but this time play it completely as normal, so you have access to the save icon in the Johnson house. Save the game after completing the mission. Alternatively, if you've purchased the Santa Maria Beach Safehouse and drove the Voodoo there, make sure to 'confirm' the vehicle first (by opening the garage so it is there for you in pristine condition and then closing it) before saving.
  8. If you then go back to the garage and see the Pink Voodoo there, you will now be able to access it and drive it yourself to anywhere you please.
 
Last edited:
This post covers the details of obtaining TWO special vehicles in one mission without failing! Yes, you can obtain the next two vehicles for your own use and you can still pass the mission. It concerns the following vehicles:

gallery6.jpg
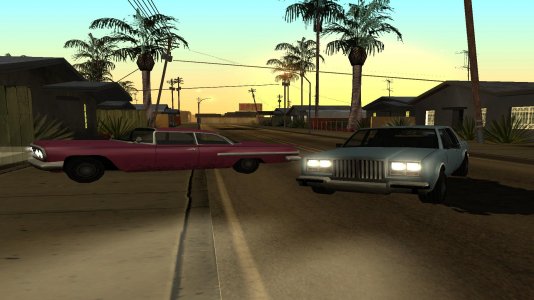
A second unique pink Voodoo used by the Ballas, and Sweet's Greenwood, both found in the mission 'Drive-Thru'.

Information
  • If you couldn't obtain the pink Voodoo from the mission 'Sweet & Kendl', or you already did so and want to have simply a second, this is your only chance to do so; this car will NOT appear again inside or outside missions afterwards.
  • Sweet's Greenwood car here is Fireproof, which means that it can NOT be damaged from driving through fires, or when attacking it using a Flamethrower or Molotov Cocktails.
How to obtain the cars:

What is needed:
  • Storage space in the Johnson House Garage
  • Body Armor, just in case
  • A Submachine Gun (MP5) or Assault Rifle (like the AK-47) is recommended to have.
The steps:
  1. Play the mission as normal until the cutscene of Ryder spotting the Ballas car has finished.
  2. Do NOT chase the Ballas car right away! Instead, drive a bit backwards and go to the left, then drive forward to the right into the alley behind the Cluckin' Bell to come out ahead of the Ballas car, drive to the intersection leading to the railroad crossing and stop the car.
  3. Get out of the Greenwood, aim your weapon at the driver of the Ballas car and shoot. If done right, you'll headshot the driver so he'll fall out of the car, like in the mission 'Sweet & Kendl', then kill the other Ballas member. Do NOT enter Sweet's car afterwards yet.
  4. Step into the Pink Voodoo and drive it towards Big Smoke's House in Idlewood and park it beside the palm tree on the grass area, where you'll face Big Smoke's house across the street.
  5. Get out of the Pink Voodoo, but do NOT close the door as that will lock the car, and making it despawn after the mission ends.
  6. Run back towards Sweet's Car whom is still waiting for you (indicated by a blue icon on the radar)
  7. Finish the mission as normal, but when arriving at Big Smoke's House, reverse the car into the marker, so that you will face the Pink Voodoo once the cutscene ends.
  8. When the mission is complete, you can first drive the Pink Voodoo to the garage at the Johnson House, then return to pick up the Fireproof Greenwood, or you can step into the Pink Voodoo first so it won't vanish as quickly as it would, then get out and push the Voodoo to the Johnson House Garage using the Greenwood.
  9. Park both cars inside the garage, let the door close up and then open it again. You now have (another) Pink Voodoo once used by the Ballas as well as Sweet's Fireproof Greenwood at your disposal to use at any time you like.
 
This post covers the details of obtaining an All-Proof Tampa car from the mission 'Nines and AKs'.

All-Proof means that the car is Bulletproof, Damageproof, Explosionproof, Fireproof AND Meleeproof.

gallery10.jpg
The only ways that this car can be destroyed is by either tipping it over on its roof, punching it while wearing a parachute or equip it with a Car Bomb for example.

How to obtain this car:

What is needed:
  • Storage space in the Johnson House
  • Body Armor (mandatory here)
  • Forklift (either parked in the Johnson House beforehand, or fetch one from Ocean Docks)
The steps:
  1. Play the mission 'Nines and AKs' until you are instructed to shoot the bottle with the 9mm pistol. Don't shoot the bottle, but instead, take Big Smoke's Glendale car and drive it back to the Johnson House and store it in the garage, and then push it sideways, so when you open the garage, you see the car as if you were looking at it from the side (like in the Tampa image above).
  2. If you haven't obtained a Forklift yet, move to Ocean Docks to get one and park it in the Johnson House Garage. This will be important later.
  3. Make sure you have Body Armor on. You can pick up one underneath an overpass close to the Johnson House cul-de-sac on the left side if you need to fetch it.
  4. Move back to Emmet's location as indicated on the Radar. Don't do anything there in terms of shooting bottles, instead, move about to push the Tampa back to the Johnson House Garage. This can be easily done on foot.
  5. Park the Tampa in the Johnson House while making it face the same position as Big Smoke's car at the back!
  6. Use the Forklift to flip the Tampa over. The Forklift's forks can be raised and lowered by using the Num8 and Num2 keys on the keyboard respectively.
  7. Once the Tampa is flipped over, move the Forklift backwards, get out of it and get into the garage while the Tampa catches fire. If you have the Body Armor on, you will survive the explosion of both the Tampa and Big Smoke's car, which also fails the mission.
  8. Get out of the garage and let the door close up.
  9. Approach the garage again. Both vehicles are restored, and the All-Proof Tampa is now completely at your disposal to do what you please with it. Be sure to remove Big Smoke's car if you want to store the Tampa and another car beside it later on.
 
This post covers the details of obtaining an All-Proof PCJ-600 bike, owned by a Vagos member named Freddy from the mission 'OG Loc'.

All-Proof means that the bike is Bulletproof, Damageproof, Explosionproof, Fireproof AND Meleeproof.

gallery11.jpg
How to obtain this bike:

What is needed:
  • Storage space in the Johnson House
  • Body Armor (optional)
  • A Submachine Gun or Assault Rifle
The steps:
  1. Play the mission 'OG Loc' as normal, until the cutscene of Freddy moving away on his bike has played and you have regained control of CJ.
  2. Drive the bike you're given up onto the street, but do NOT pursue Freddy! Instead, stop on top of the street, keeping Freddy in your sight and get off of the bike.
  3. Using your Assault Rifle or Submachine gun, shoot and kill ANY Ballas member you see right away from your position.
  4. Then, shoot and kill OG Loc, which will fail the mission.
  5. If done right, Freddy will get off of his bike and move to attack you. This is your opportunity to get on Freddy's Bike and drive it to the Johnson House garage to store it.
  6. Now you have an All-Proof PCJ-600 bike at your disposal to use.
Note: Should this attempt fail at the 5th step and the mission has failed, you can try again with a neat little feature that is coded into the game; this is one of the missions that contains a so-called 'Trip Skip', which allows you to skip the ride to a certain destination past the first attempt.
 
Last edited:
It's been a while since I've played this game (basically a decade!!). Great write up! Makes me wonder if they ever (make a proper) remake, this stuff will still be useful.
 
Glad you like the write-ups so far. I've got more:

This post will detail the steps to obtain a Mesa with a Unique Green Colour from the mission 'Robbing Uncle Sam'.

gallery141.jpg
How to obtain this car:

What is needed:
  • Storage space in any safehouse garage, Verdant Bluffs would be the closest.
The steps:
  1. Play the mission 'Robbing Uncle Sam' as normal, until you have to shoot the lock of the warehouse containing four of the crates, and after you let Ryder drive the Mule inside.
  2. Don't open the warehouse yet; instead, step into the Mesa and drive it to the safehouse of your choice. Stash the car in the garage.
  3. Return to Ocean Docks and just play the rest of the mission as normal. Yes, you can obtain this car without having to fail the mission first.
 
This post details the steps needed to acquire the Pony van used in the mission 'Life's A Beach'. This Pony van is unique in two ways: it has a unique teal colour on its body, and it also has a unique modification: Off-Road Wheels, which is unique as the van itself can NOT be modified at a mod shop like Transfender.

gallery451.jpg
How to obtain this van:

What is needed:
  • Storage space in the Santa Maria Beach Safehouse garage (as it is the closest to the beach party).
The steps:
  1. Play the mission 'Life's A Beach' normally (dance sequence included), until you're tasked to steal the sound van.
  2. Get into the van and drive away, but do NOT drive to the storage destination! Get to the road and drive towards the Santa Maria Beach Safehouse instead.
  3. Drive the van onto the beach and towards the water.
  4. Carefully drive the van into the water until you see the 'Mission Failed' message pop up. If you do this right, you should be able to reverse out of the water.
  5. If Step 4 has succeeded, you are now the proud owner of a Unique Pony Van with Off-Road Wheels and a Sound System inside for you to store inside the Santa Maria Beach Safehouse.
 
This post is the first out of four in regards to the mission 'Just Business', as it is possible to obtain multiple unique vehicles, but only one at a time for the best options.

Just Business 1/4: the All-Proof Sultan

The first post will detail how to acquire an All-Proof Sultan, a four-doors sports sedan from the mission 'Just Business'.

gallery646.jpg
How to obtain this car:

What is needed:
  • Storage space in the Verdant Bluffs Safehouse
  • Body Armor
  • Infinite Sprint (optional but recommended, obtained through Burglary Mission)
  • Luck
The steps:
  1. Play the mission 'Just Business' up until the shootout outside the Atrium.
  2. Take out the two Russian Mobsters whom are actively attacking Big Smoke (one is crouching close from your starting position outside, and the other is standing a bit further back).
  3. Sprint to the left side of your position and jump down. You'll survive the fall regardless, and Big Smoke won't take any further hits from the mobsters.
  4. Once on the ground level, sprint towards the Going Gas Station nearby and stand in front of the Sprunk! Vending Machine and make sure you see the prompt to buy a drink. DO NOT DO ANYTHING! Just stand there and let Big Smoke finish the shootout himself, at which the cutscene comes of Big Smoke driving the BF-400 with CJ going at the back, but be a bit 'hesitant' about the shooting the enemies (as in let the health of the bike drain gradually to about half-way).
  5. Continue the mission as normal until after the cutscene of a packer carrying the All-Proof Sultan landing in the drain channel.
  6. Once you gain control of CJ, press Enter as if you were to 'buy a drink'. This will let CJ get off of the bike.
  7. The bike's health will be quickly depleted which will also kill Big Smoke, failing the mission, but you are still alive.
  8. Kill the remaining Russians that may exit the pursuing cars.
  9. Take the All-Proof Sultan off of the Packer as it is unlocked and get it on the road.
  10. You are now free to take this new car to any of your safehouses (Verdant Bluffs should be the nearest) to store it.
 
This post is the second out of four in regards to the mission 'Just Business', as it is possible to obtain multiple unique vehicles, but only one at a time for the best options.

Just Business 2/4: A BF-400 (Damage, Fire and Explosion-proof)

The first post will detail how to acquire a Damage-, Explosion- and Fireproof BF-400 from the mission 'Just Business'.

gallery337.jpg
How to obtain this bike:

What is needed:
  • Storage space in the Verdant Bluffs Safehouse
  • Body Armor
  • Infinite Sprint (optional but recommended, obtained through Burglary Mission)
  • Luck
The steps:
  1. Play the mission 'Just Business' up until the shootout outside the Atrium.
  2. Take out the two Russian Mobsters whom are actively attacking Big Smoke (one is crouching close from your starting position outside, and the other is standing a bit further back).
  3. Sprint to the left side of your position and jump down. You'll survive the fall regardless, and Big Smoke won't take any further hits from the mobsters.
  4. Once on the ground level, sprint towards the Going Gas Station nearby and stand in front of the Sprunk! Vending Machine and make sure you see the prompt to buy a drink. DO NOT DO ANYTHING! Just stand there and let Big Smoke finish the shootout himself, at which the cutscene comes of Big Smoke driving the BF-400 with CJ going at the back, but be a bit 'hesitant' about the shooting the enemies (as in let the health of the bike drain gradually to about half-way).
  5. Continue the mission as normal until after the cutscene of a packer carrying the All-Proof Sultan landing in the drain channel.
  6. Once you gain control of CJ, press Enter as if you were to 'buy a drink'. This will let CJ get off of the bike.
  7. The bike's health will be quickly depleted which will also kill Big Smoke, failing the mission, but you are still alive.
  8. Kill the remaining Russian mobsters that may exit the pursuing cars.
  9. Take the BF-400 Which the Russian mobsters have been riding on and drive it to any of your safehouses (Verdant Bluffs should be the nearest) to store it.
 
This post is the third out of four in regards to the mission 'Just Business', as it is possible to obtain multiple unique vehicles, but only one at a time for the best options.

Just Business 3/4: A BF-400 (Unique Color through TransFender)

The first post will detail how to acquire a BF-400 with any Color you wish from TransFrender from the mission 'Just Business'. This is a unique color as in any normal circumstance, motorcycles can NOT be modded through shops like TransFender.

gallery131.jpg

How to obtain this bike:

What is needed:
  • Storage space in any Safehouse available of your choosing
  • Body Armor
  • Infinite Sprint (recommended, obtained through Burglary Mission)
  • Luck
The steps:
  1. Play the mission 'Just Business' up until the shootout outside the Atrium.
  2. Take out the two Russian Mobsters whom are actively attacking Big Smoke (one is crouching close from your starting position outside, and the other is standing a bit further back).
  3. Sprint to the far side of the Atrium and jump down. You'll survive the fall regardless, and Big Smoke won't take any further hits from the mobsters.
  4. Once on the ground level, sprint towards the Roboi Mart where you can do the Los Santos Courier Mission and hop on the BMX standing there.
  5. Ride the BMX towards Ammunation in Market, until you find any random vehicle that spawns there. As long as it's NOT a Sadler, Yosemite or Savanna, get off the bike and into the car!
  6. Drive towards the TransFender shop in Rodeo and enter the shop!
  7. Wait until Big Smoke finishes the shootout! (This is where your luck comes in; it's possble that he is done with the shooting quickly, or that it takes a long time!)
  8. If luck is on your side, you will see a glitched cutscene of CJ and Big Smoke going onto an invisible BF-400. Continue the mission as normal, wait until you drive under the Red Marker while riding in the Drain Channel
  9. When the cutscene plays of where normally the Packer driven by Russian mobsters enters the channel, quickly choose any color you wish (like green in the screenshot I provided)! You will get a message that Big Smoke died, thus failing the mission, but you will spawn inside the Transfender on the backseat of the bike.
  10. Get off of the bike and get back on so you can drive it.
  11. Now you can take the bike to ANY safehouse of your choosing to save it.
 
This post is the last out of four in regards to the mission 'Just Business', as it is possible to obtain multiple unique vehicles, but only one at a time for the best options.

Just Business 4/4: A BF-400 (Unique Color and Unique Mutation: Mutated Wheels through TransFender)

The first post will detail how to acquire a BF-400 with any Color you wish along with a Unique Mutation: Mutated Wheels (Off-Road Wheels) from TransFrender from the mission 'Just Business'. This is unique as in any normal circumstance, motorcycles can NOT be modded through shops like TransFender.

gallery128.jpg

How to obtain this bike:

What is needed:
  • Storage space in any Safehouse available of your choosing
  • Body Armor
  • Infinite Sprint (recommended, obtained through Burglary Mission)
  • Luck
The steps:
  1. Play the mission 'Just Business' up until the shootout outside the Atrium.
  2. Take out the two Russian Mobsters whom are actively attacking Big Smoke (one is crouching close from your starting position outside, and the other is standing a bit further back).
  3. Sprint to the far side of the Atrium and jump down. You'll survive the fall regardless, and Big Smoke won't take any further hits from the mobsters.
  4. Once on the ground level, sprint towards the Roboi Mart where you can do the Los Santos Courier Mission and hop on the BMX standing there.
  5. Ride the BMX towards Ammunation in Market, until you find any random vehicle that spawns there. As long as it's NOT a Sadler, Yosemite or Savanna, get off the bike and into the car!
  6. Drive towards the TransFender shop in Rodeo and enter the shop!
  7. Wait until Big Smoke finishes the shootout! (This is where your luck comes in; it's possble that he is done with the shooting quickly, or that it takes a long time!)
  8. If luck is on your side, you will see a glitched cutscene of CJ and Big Smoke going onto an invisible BF-400. Continue the mission as normal, wait until you drive under the Red Marker while riding in the Drain Channel
  9. When the cutscene plays of where normally the Packer driven by Russian mobsters enters the channel, quickly choose the Off-Road Wheels and any color you wish (like green in the screenshot I provided)! You will get a message that Big Smoke died, thus failing the mission, but you will spawn inside the Transfender on the backseat of the bike.
  10. Get off of the bike and get back on so you can drive it.
  11. Now you can take the bike to ANY safehouse of your choosing to save it. The bike will perform just the same, but now looking quite rad with these mutated wheels on it.
 
This post will give the details on how you can make any vehicle of your choice Explosion and Fireproof in the mission 'Gray Imports'. The example here is one of the Pink/Scarlet Voodoos found in the missions Sweet & Kendl and Drive-Thru respectively.

gallery2.jpg

How to obtain this car:

What is needed:
  • Storage space in any Safehouse available of your choosing (Verdant Meadows/El Corona Safehouse is the nearest)
The steps:

  1. Start the mission 'Gray Imports' as normal.
  2. Take any vehicle of your choosing and drive into the Red Marker just outside the Warehouse area at Ocean Docks, from where the mission begins proper.
  3. Take the vehicle to the nearest safehouse to store it.
  4. Continue and finish the mission as normal.
 
Last edited:
This post covers the details of obtaining a Unique Black Coloured Elegant from the mission 'Management Issues'.

gallery381.jpg
How to obtain this car:

What is needed:
  • Storage space in the Santa Maria Safehouse
The steps:
  1. Play the mission 'Management Issues' as normal, until you have to drive the Elegant towards the pier at Santa Maria/Verona Beach.
  2. Do NOT drive to the pier! Drive instead towards the Santa Maria Safehouse.
  3. Drive the car towards the water and carefully inch your way into the water until your 'passengers' 'drown', which completes the mission.
  4. If done right, you should be able to reverse out of the water back onto the beach and store the car into your Safehouse.
 
This post is to inform you that there is a way to maximize vehicle storage at the Mulholland Safehouse. The garage at the Mulholland Safehouse is rather small to store two cars in and it is very likely they may get stuck there (as in you won't be able to get them out, unless you've reversed them into the garage, which make retrieval by Tow Truck the only viable option).

However, it should be noted that the roof of that garage is flat; to the extent that it technically allows for storing a small helicopter like a Seasparrow on it, or you can park up to three cars on the roof, while leaving the inside of the garage for the fourth car.

gallery385.jpg
In my example above here, I've stored a Fireproof Greenwood, the Unique Black Elegant and a Bullet/Fireproof Tahoma on top of the roof of the garage.

How to get a car onto the roof of the Mulholland Safehouse Garage:
  1. Store the car you wish to put onto the roof of the garage first inside the garage, so it will NOT despawn when you leave the area.
  2. Get the Packer truck with a ramp on it. It can be usually found driven around Ocean Docks if you want to try this method early on in the game after you've purchased the Safehouse.
  3. Drive the Packer towards the Mulholland Safehouse. It may be tedious as it will not easily scale the hills leading up to it, but with patience and dilligence, you can get it up there.
  4. Park the car in front of the Mulholland Safehouse and get the car which you want to store on the roof out of the garage itself.
  5. Park the Packer in front of the garage with the ramp leading towards it.
  6. Drive the car you wish on the ramp of the Packer and onto the roof of the Mulholland Safehouse Garage.
  7. If done right, you now have a car safely stored at the Mulholland Safehouse as if it were inside the garage. Please note that due to the game's mechanic, the vehicles on the roof 'vanish' when the garage door closes. This is normal; the vehicles stored on the roof will reappear once you approach the garage and the main door of it opens up.
 
This post details the steps as to how to obtain a Bullet/Fireproof Tahoma from the mission 'House Party' for your own use.

gallery383.jpg
How to obtain this car:

What is needed:
  • Storage space in the Johnson House Garage
  • Bike stored in the Johnson House Garage (recommended)
The steps:
  1. Play the mission 'House Party' as normal, complete it like you normally would.
  2. Once the mission is completed, turn right from your position and you will see two Voodoos and two Tahoma's there. Note that these vehicles are locked and will despawn when out of sight for a little while (as in off-screen).
  3. Move behind the Tahoma of your choice and push it to the Johnson House Garage.
  4. When close to the garage, move towards it initially to retrieve the bike you've parked in there and park it just halfway outside the garage, so the garage door will stay open.
  5. Push the Tahoma into the open garage.
  6. Park the bike back into the garage, then leave so the garage door closes.
  7. Move back to the garage door so it opens. The Tahoma is now unlocked and ready for you to drive in.
 
This post details the steps as to how to obtain an All-Proof Admiral from the mission 'Los Sepulcros'. This is a unique grey coloured Admiral owned by Kane, one of the main leaders of the Ballas gang.

All-Proof means that the car is Bullet/Damage/Explosion/Fire AND Melee-proof, the only ways it can be destroyed is by e.g. flipping it over on its roof, hitting the car while wearing a parachute or dump it in the water.

gallery39.jpg
How to obtain this car:

What is needed:
  • Storage space in any safehouse of your choosing
  • Assault Rifle (AK-47 or M4)
  • Spray Can
  • Luck/Timing
The steps:
  1. Play the mission 'Los Sepulcros' like normal until you're instructed to climb over the fence leading into the graveyard.
  2. Once in the graveyard, don't approach Sweet right away. Instead, take out your Assault Rifle and shoot Sweet exactly 33 times so that only a sliver of his health remains.
  3. Switch to the Spray Can, approach Sweet and use the Spray Can on him. Sweet will fall and, if you timed it right, the screen will fade to black as if to trigger the cutscene as it normally would where Sweet would say to get ready for Kane's arrival. Instead, you will get a unique mission failure message: "Sweet's been killed! That wasn't part of the plan!"
  4. Move into the graveyard and look to the left. You will see the grey Admiral standing there with a Ballas member behind the wheel.
  5. Shoot the Ballas member through the head to make him fall out of the car with the driver door open.
  6. Get into the grey Admiral and drive to a Safehouse of your choice (I went for the Santa Maria Beach Safehouse as in the picture above location-wise) and store it.
  7. You now have essentially 'stolen' Kane's Admiral for your own use.
 
Last edited:
This post will detail the steps needed to obtain an All-Proof Sabre car from the mission 'Tanker Commander'.

All-Proof means that the car is Bullet/Damage/Explosion/Fire AND Melee-proof, the only ways it can be destroyed is by e.g. flipping it over on its roof, hitting the car while wearing a parachute or dump it in the water.

gallery326.jpg
How to obtain this car:

What is needed:
  • Storage space in the Dillimore Safehouse
  • Sniper Rifle
  • Tow Truck or Tractor parked in the Dillimore Safehouse Garage.
The steps:
  1. Start the mission 'Tanker Commander', which is the easiest to do after the 'First Date' cutscene mission.
  2. Once you're task to enter the cabin of the truck, don't enter the cabin! Move instead towards the Dillimore Safehouse to fetch the Tow Truck or Tractor you parked there.
  3. Drive the Tow Truck/Tractor to the parking lot beside the Gas Station. The All-Proof Sabre is parked there, which is for the time being locked, barring your from entering.
  4. Leave the Tow Truck/Tractor and move to a position where you have (part) of the Sabre in your sight (as in visible on-screen), then take out your Sniper Rifle and shoot Catalina to kill her which will fail the mission. Keep the Sabre in your sight at all times!
  5. While still keeping the Sabre in your sight, move back and enter the Tow Truck/Tractor.
  6. Reverse the Tow Truck/Tractor towards the Sabre, then lower the towing cable and hook so it will connect with the Sabre's Front side, then raise it to raise the Sabre's front up a bit, so you can now tow it away.
  7. Drive towards the Dillimore Safehouse.
  8. Reverse into the Dillimore Safehouse Garage and release the Sabre into it. Drive away while keeping the Sabre on-screen so the garage door closes.
  9. Open the Garage door again. The All-Proof Sabre is now unlocked and ready for you to drive in.
 
This post will detail the steps needed to obtain an All-Proof Sadler car from the mission 'Tanker Commander'.

All-Proof means that the car is Bullet/Damage/Explosion/Fire AND Melee-proof, the only ways it can be destroyed is by e.g. flipping it over on its roof, hitting the car while wearing a parachute or dump it in the water.

gallery325.jpg
How to obtain this car:

What is needed:
  • Storage space in any Safehouse of your choosing that's available
The steps:
  1. Start the mission 'Tanker Commander', which is the easiest to do after the 'First Date' cutscene mission.
  2. Complete the mission as normal, make sure you take out the two workers pursuing you in the Sabre early once you are in the cabin of the truck.
  3. Upon completion of the mission, head for the gas station next to the RS Haul Trucking Company.
  4. The All-Proof Sadler is parked there. Just step into the car and drive it to any of the safehouses you have available.
Technically, this special vehicle is one of the easiest to obtain, given how you can simply take it after completing the mission as long as you know where to find it.
 
This post will detail the steps needed to obtain up to two All-Proof HPV1000 Police Bikes from the mission 'Small Town Bank'.

All-Proof means that the bike is Bullet/Damage/Explosion/Fire AND Melee-proof, the only ways it can be destroyed is by e.g. hitting the bike while wearing a parachute or dump it in the water.

gallery34.jpg
How to obtain these bikes:

What is needed:
  • Storage space in the Palomino Creek Safehouse
The steps:
  1. Start the mission 'Small Town Bank', which can be started after doing either 'First Date', 'First Base', 'Gone Courting' or 'Made in Heaven', depending on which of the robbery missions is done with Catalina.
  2. Proceed with the mission until the cutscene has played of the two Police Bikes entering the alley during the backalley shootout.
  3. Shoot Catalina down to kill her, which fails the mission.
  4. Now get on either one of the police bikes if you want to have just one and take it to the Palomino Creek Safehouse, but beware of the Wanted Level that you still have. If you want the other Police Bike too, get off of the first one after getting on it and step onto the other, this prevents it from despawning for a while, just enough for you to retrieve it still if you're fast and skillfull enough.
  5. Save your game after storing either one or both police bikes, which will clear the wanted level.
  6. You now have two invincible Police Bikes at your disposal, which can come in handy in case you wish to tackle the Vigilante side mission.
 
Back
Top Bottom